Fiber Fashion Paper Dolls
Make a fashionable paper doll!
Medium: Fiber + Wearable
Ages: 8+
Safety considerations: None, but make sure needle is blunt
Time: 2 hours

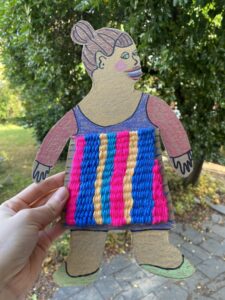
Description: Get inspired by the textures of fiber artist Kate Koconis, and learn to weave by making a fashionable paper doll.
Conversation Questions: Journal about, think about or ask each other
- Kate Koconis creates different TEXTURES with fiber in her art. Which TEXTURES can you find around you?
- Kate Koconis uses SHAPES and LINES in her artwork. Where do you see shapes and lines in her artwork?
- Which SHAPES and LINES can you see around you that can inspire you in your own art?
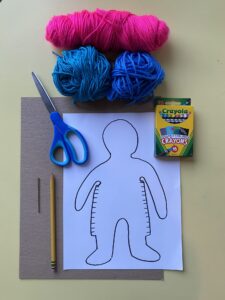
Supplies:
- Colored pencils or Construction paper crayons
- Chip Board or Carboard
- Scissors
- Yarn
- Plastic needle or Metal needle with blunt end
- Pencil
- Template for paper person
Steps:
- Cut out the template for your paper person

- Trace the template onto chipboard
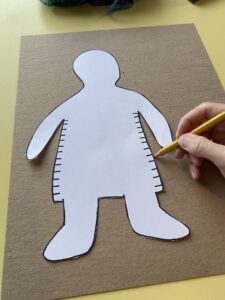
- Transfer cut lines
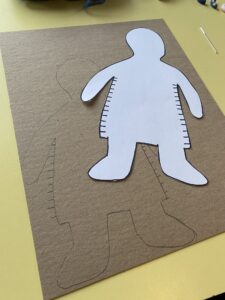
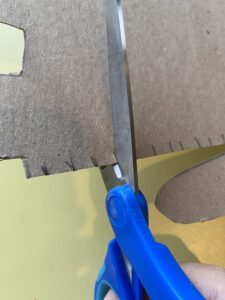
- Cut out the person and make sure you can see cut lines
- Cut into the side of the paper person (do not cut further then length of pattern)
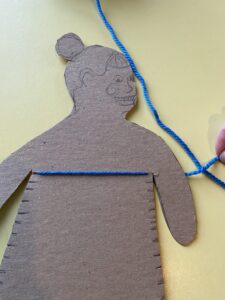
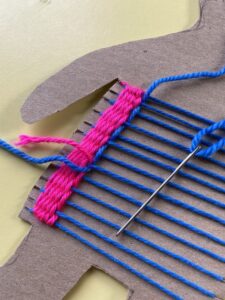
- Take a piece of string off the roll and keep it attached so you don’t run out of it. Turn your paper person to the back (you can label it so you don’t get confused) and tape the end of the string to the right armpit.
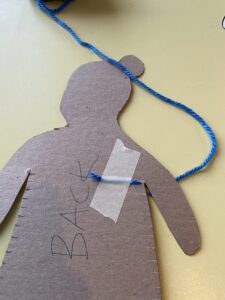
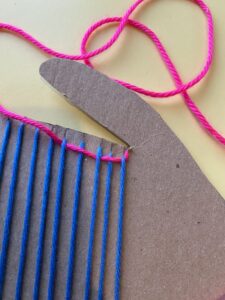
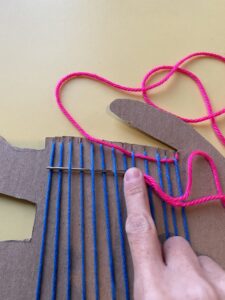
- Turn your person to the front (you can draw a face so you don’t get confused). Put the string into the cut that you made, then place it across the body and into the opposite cut. You want your string to be taught (no slack at all).
- Turn your person to the backside and place it across the back, reaching to the NEXT cut, below the first one. Every pass, you need to make sure it is taught!
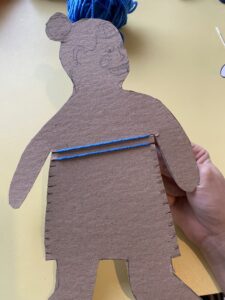
- Keep flipping your person and continue all the way to the bottom
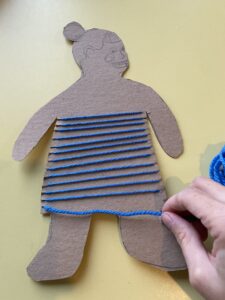
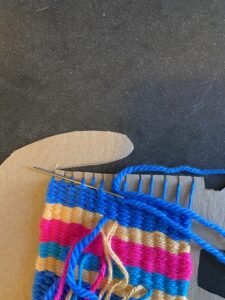
- Cut and tape the end on the bottom backside. Now, cut a piece of string about the length of the center of your body to your finger tips when your arm is spread out (about a yard). Tape it on the back on the right armpit. Thread your needle.
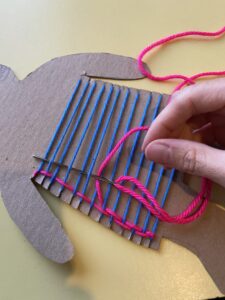
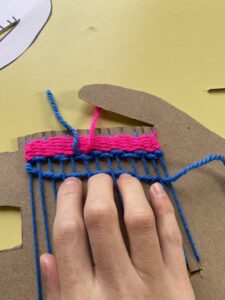
- Turn to the front side and begin to weave. Weaving is when you go over one thread, then under one thread, repeating this pattern. You can see in the picture how you can guide the needle to do this.
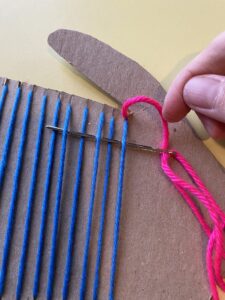
- Pull the string through and continue all the way down the body.
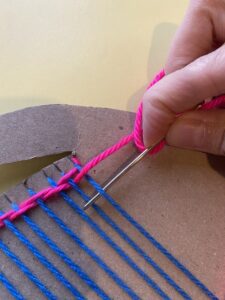
- Use your fingers to push all the thread to the side, then flip the body and begin working your way back. You want to make sure your yarn loops over the end piece to catch it in. This also makes it so that the yarn is alternating over/under and is the opposite from the last pass that you did.
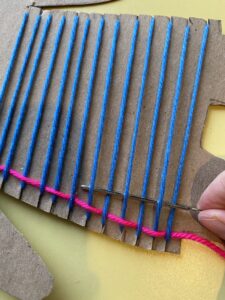
- Continue all the way across the body. Make sure not to pull too hard because you don’t want the ends to scrunch in. If you mess up the over/under pattern, or pull it too hard, just back it out and start again!
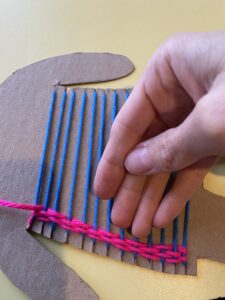
- When you’ve gone all the way across, flip the body and keep weaving, always making sure to catch the end in!
- Keep squishing all the yarn down with your fingers.

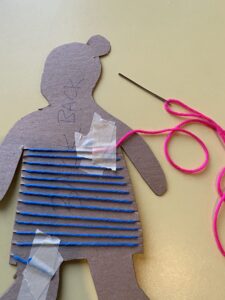
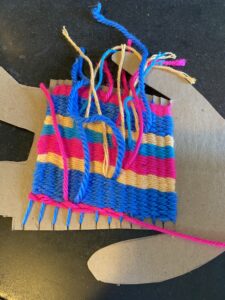
- When you run out of yarn, make sure to leave a tale that is a couple of inches long (we will weave this back in later, and you need length to do that). Cut a new color of yarn and place it under the same thread that you ended the last color on.
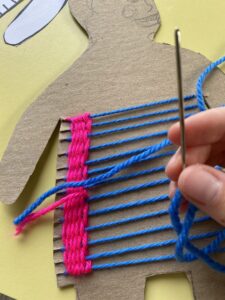
- Continue weaving and squishing all the yarn together!
- Continue to add colors as needed.
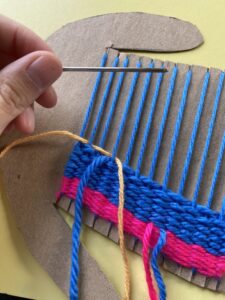
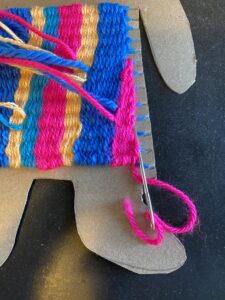
- Since the shape of the body is not a square, you will have a triangle left at the end. Go as far as you can.
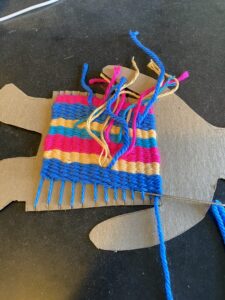
- Use the needle to get into the tight spaces.
- Fill in the triangle as far as you can.
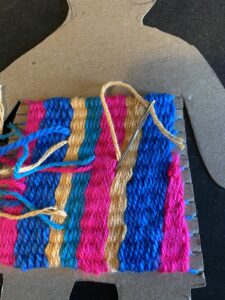
- Weave the ends in by placing the needle into your woven fabric, threading the needle, then pulling the end under the fabric to hide it. You’re done with weaving the outfit!
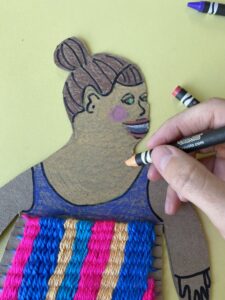
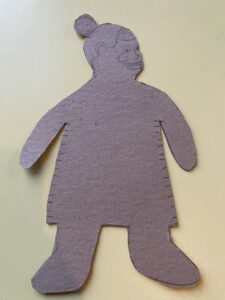
- Use a sharpie to add any details you would like.
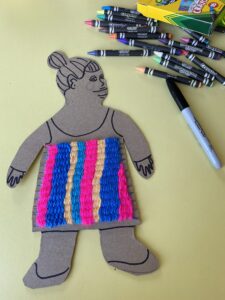
- Use colored pencils or crayons to color it in.